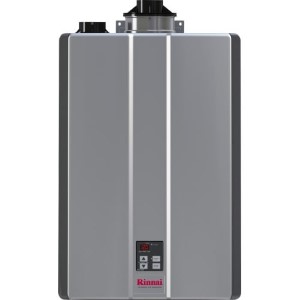
How to Replace a Gas Control Valve on Bosch Tankless Water Heaters
Replacing a gas control valve on a water heater, although not overly complicated, involves precise steps that must be followed to ensure the safety and proper functioning of the appliance.
While basic tools and a careful approach can make this a manageable DIY project for some, the complexity and potential hazards associated with gas tankless water heaters strongly advise the involvement of a licensed technician.
For those interested in understanding the process or undertaking this task, a detailed guide follows, expanded to provide a thorough overview of each step, precautions, and additional considerations.
How to replace a gas control valve on Bosch tankless water heaters
Tools required
- Phillips and small head screwdriver
- 4mm Allen wrench
- Adjustable wrench
- Combustion gas analyzer
Instructions
- Turn off the water heater and the main gas shut-off valve that supplies the unit. This step is vital to prevent any gas leakage or accidental ignition during the repair process.
- Start by removing the two Phillips head screws that secure the front cover to the water heater. Carefully pull the cover away from the heater and lift it upwards to remove it.
- Unclip the two upper and lower clips that hold the combustion chamber cover in place. This will expose the internal components necessary for the valve replacement.
- Remove the three Phillips screws securing the control unit. Ensure the engaging tabs are properly positioned before gently lowering the control unit, providing access to the gas valve.
- Disconnect the wire connection and silicone tube from the gas valve. Then, use an adjustable wrench to loosen the large hex nut and remove the three Allen screws on the top of the gas valve. This will free the valve from its position.
- Before installing the new gas valve, inspect and replace the fiber washer on the left and the rubber gasket on the top if necessary. These components ensure a tight seal and prevent gas leaks. Secure the new valve with the three Allen screws and the hex nut.
- Open the manual shut-off gas valve slightly to allow gas to flow to the newly installed valve. Apply soap foam around the connections and observe for bubbles, which indicate a gas leak. Tighten any connections as needed to ensure a leak-free seal.
- Reattach the silicon tube and wire connection to the gas valve. Carefully put back the combustion chamber cover, control unit, and the front panel in reverse order of disassembly.
- Once reassembled, resume power to the unit and check its operation. Proper calibration of the gas valve may be necessary to ensure optimal performance. If the unit does not run correctly, further adjustments to the gas valve may be required.
Understanding the gas control valve in tankless water heaters
The gas control valve is a critical component of any gas-powered tankless water heater, serving as the heart of the gas delivery system.
It regulates the flow and pressure of gas to the burner, ensuring a precise mixture of gas and air for efficient combustion.
This valve responds to demands for hot water by adjusting the gas flow to increase or decrease the heat output, thereby controlling the water temperature.
Modern gas control valves incorporate safety mechanisms to shut off the gas supply under dangerous conditions, such as a failure in the ignition system or a detected gas leak, preventing accidents.
Potential problems with gas control valves
Despite their importance, gas control valves can be the source of several potential issues in tankless water heaters:
Failure to ignite: A malfunctioning gas control valve may fail to open properly, preventing gas from reaching the burner and causing the unit to fail to ignite. This can be due to electrical issues, mechanical failure, or obstructions in the valve.
Inconsistent water temperature: If the valve does not modulate the gas flow accurately in response to water demand, it may result in fluctuating water temperatures. Users might experience sudden changes between hot and cold water, indicating a problem with the valve's control mechanism.
Gas leaks: Although less common, wear and tear or damage to the valve can lead to gas leaks, posing a significant safety risk. Regular maintenance and checks are essential to ensure the integrity of the valve and the safety of the household.
Wear and tear: Over time, the mechanical parts of the gas control valve can wear out, leading to inefficiencies or failure. Regular inspection and maintenance can help identify and address such issues before they lead to a breakdown.
Conclusion
Replacing a gas control valve involves meticulous attention to detail, adherence to safety protocols, and a basic understanding of the water heater's operation.
While this guide provides a comprehensive overview, it's important to consult the specific model's manual and consider the expertise of a licensed technician for complex service work.
DIY repairs on gas appliances carry risks, and the safety of your home and its occupants should always be the priority. For additional information, detailed guides, and visual aids, visiting the manufacturer's website, such as Bosch, can provide model-specific instructions and support.


